|
HOPE
The materials you
can find here. Supplies:
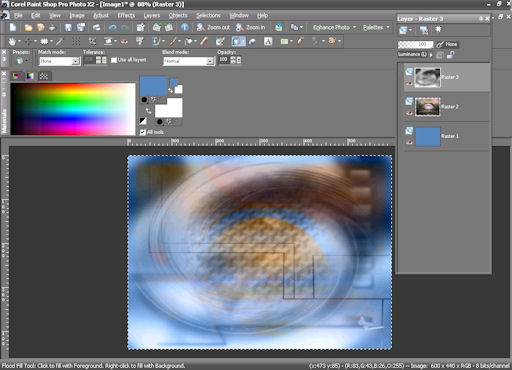
Take the arrow to know where you are in the tutorial. 1. file new image 600 x 440 pixels, transparant 2. choose a color
from the tube Yoka--LightandStairsMisted (I've taken #5482bd) 3. put this color
as your foreground color and flood fill your canvas 4. layers, new raster
layer 5. selections, select
all 6. open your background
image "hmo_galaxy", copy and paste in the selection 7. layer palette,
switch the blendmode to exclusion 8. layers, new raster
layer 9. open your background
image "cinnamon-backconcielian", copy and paste in the
selection 10. layer palette, switch the blendmode to luminance (legacy)
11. layers, new
raster layer 12. open the tube
"Yoka--LightandStairsMisted” 13. copy and paste
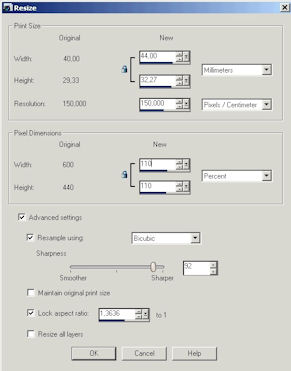
into selection 14. image, resize, 110 %, check advanced settings, all layers not checked
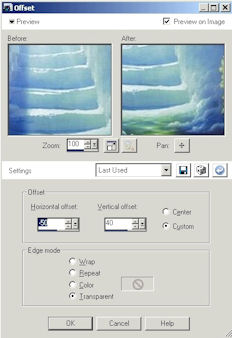
15. effects, image effects, offset, horizontal -50, vertical 40
16. layer palette,
blendmode, luminance (legacy) 17. selections,
select none 18. open the tube
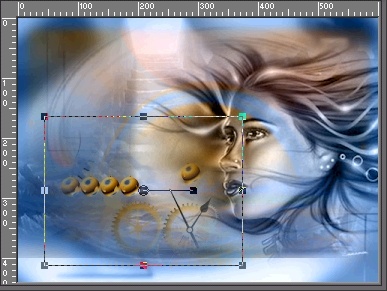
sax-mystic, image, resize 160% 19. copy and paste
as new layer, position as shown below 20. layer palette, blendmode, luminance (legacy)
21. open the tube
Marif_2006juillet_ (or whatever tube you want), image, resize 55% 22. copy and paste as new layer, position as shown below
23. layer palette,
blendmode, luminance (legacy), opacity 49% 24. layers, new
raster layer, selections, select all 25. open the misted
tube "SS_636_Misted" 26. copy and paste
into selection, layer palette, blendmode color (legacy) 27. selections,
select none 28. make your tube
sax-mystic (raster 5) invisible 29. layers, merge,
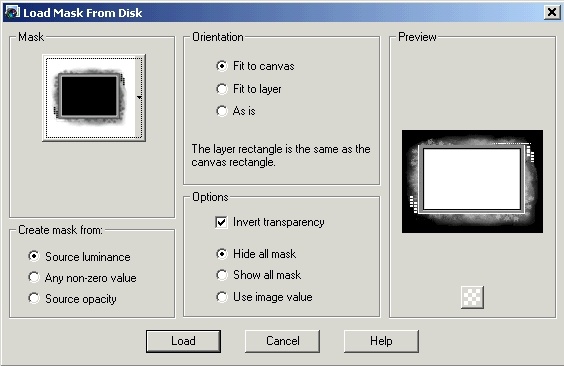
merge visible 30. layers, load mask from disk and find the mask gh_grungeframe10mask_bunnysatticdotcom with the following settings
31. layers, merge,
merge group 32. move this layer
to the bottom in your layer palette 33. layers, new
raster layer 34. flood fill this
layer with color #9298a6 or another color from your tube 35. move this layer
to the bottom in your layer palette 36. make your tube
sax-mystic visible again 37. layers, merge,
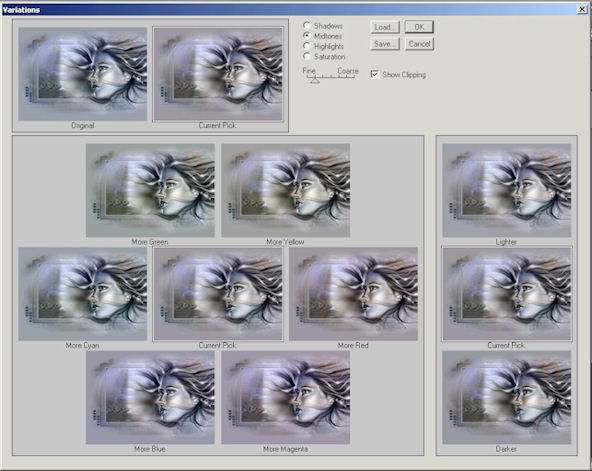
merge visible 38. effects, plugins, adjust, variations, midtones checked and fine 1 mark
39. click original
once , more yellow once and more red once. Confirm 40. image, add borders,
1 pixel, black 41. activate the
text tool and choose the font Kingthings Pique n meex, size 110
pixels 42. lock foreground
color, background color white 43. type the text
"Hope" and put it down left 44. effects, 3D-effects,
drop shadow with these settings: 1-1-70-5 black 45. choose your
font Loyalty, size 80 pixels 46. lock foreground
color, background color black 47. retype your
text and put it below the white text 48. layer palette, blend mode, soft light 49. layers, arrange,
move down 50. don't forget your signature and save as a jpg.
Extra example made by An Creatief
y Lesson Hope was written by Nancy on January 17th, 2008 Tested and checked by An Creatief. Thank you An Creatief.
This site is © Copyright Nancyspspdesign.be 2007-2008, All Rights Reserved |
|
| ar |


