|
You can find your materials here.
The tubes are from Kara, kTs, Maytika, Marif
(thank you ladies for letting me use them)
and myself.
Supplies:
6 tubes
2 fonts: Aquarelle and Harting
Filter Red Paw Media, Bleach Bypass Simulation, here
Filter LucisArt, here
Filters Unlimited 2.0, here
Filter Alien skin, Impact, Perspective shadow, demo here
Filter, Kiwi’s Oelfiter, Videowand, here
Filter L en K’s Mayra, here
Take the arrow below to know where you are in the tutorial.

File, New Image 800 x 600 pixels transparent
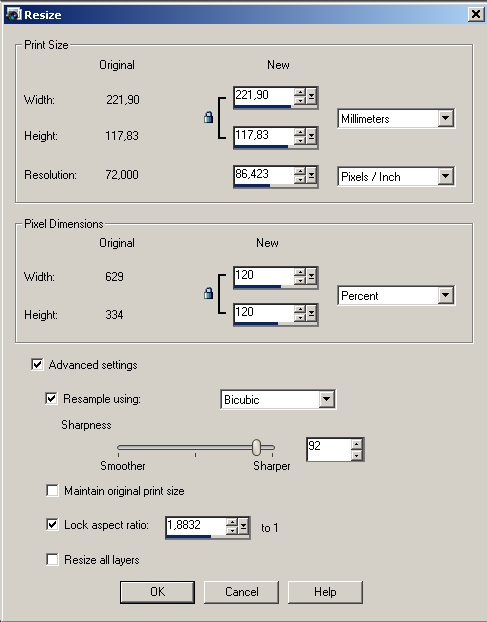
Put the foreground color to #e3e5ee and the background color to white Flood fill with foreground color Open the tube KaraT1289 Image, Resize, 120 percent

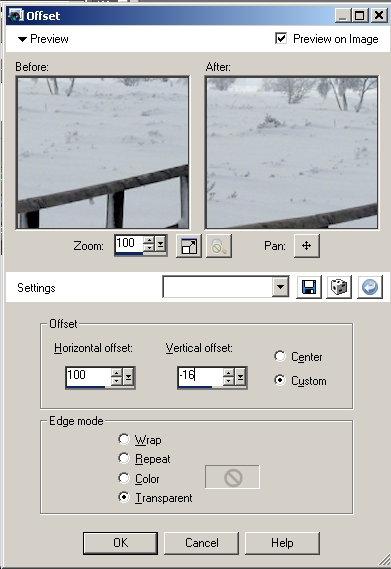
Edit, Copy and Paste as new layer Effects, Image Effects, Offset, as follows:
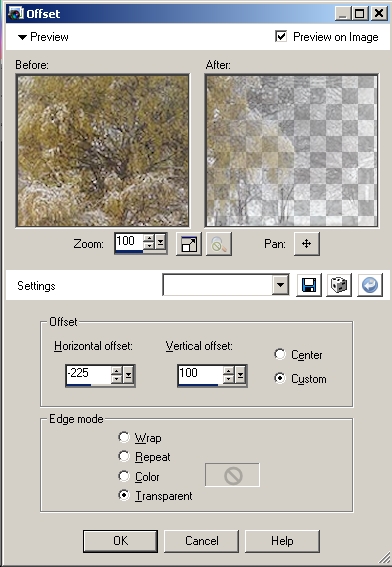
 Open the tube KTs_08j_24 copie Image, Resize, 120 percent Edit, Copy and Paste as new layer Effects, Image Effects, Offset, Horizontal -225, Vertical 100:
 Open the tube Marif_2007_10Octobre_misted_paysage081 Image, Resize, 80 percent Edit, Copy and Paste as new layer Effects, Image Effects, Offset, Horizontal 215, Vertical 160 Layers, Merge, Merge all -
SHIFT + D to make a copy of the image and put it aside, you'll need it later for the background.
Let's continue to make the painting.
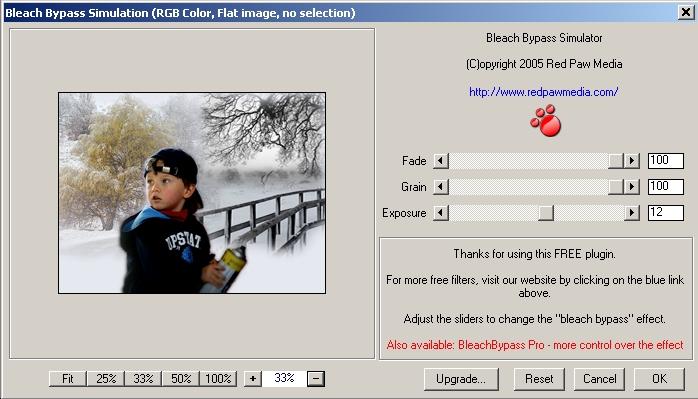
Open the tube Garçon_tageur Edit, Copy and Paste as new layer Effects, Image Effects, Offset, Horizontal -25, Vertical -85 Layers, Duplicate Select in your layer palette the bottom layer of these two layers Adjust, Blur, Gaussian blur, 5 Layers, Merge, Merge all Effects, Plugins, Red Paw Media, Bleach Bypass Simulation as follows:
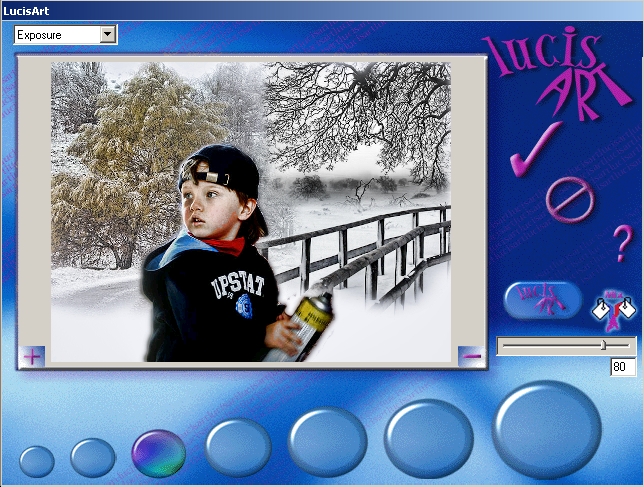
 Effects, Plugins, LucisArt, as follows:
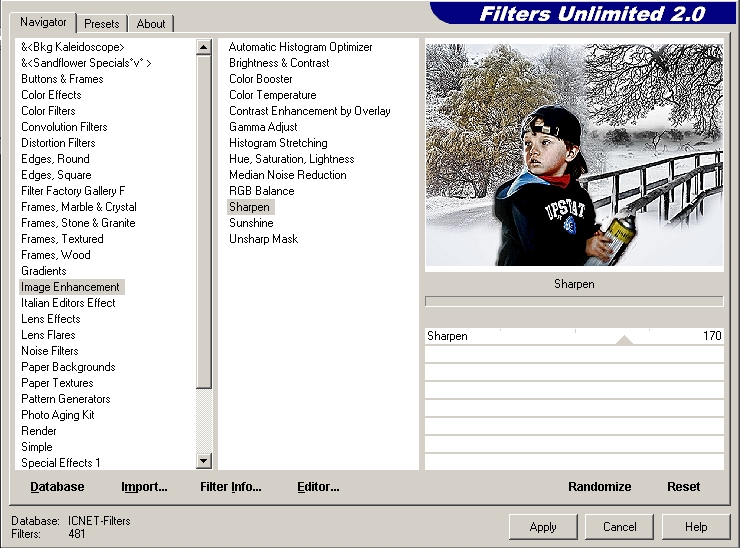
 Effects, Plugins, Filters Unlimited 2.0, Image Enhancement, Sharpen, 170
 The painting is finished. You can now open the copy you took at step 17 Open the tube easelNV0904 Edit, Copy and Paste as new layer Select the canvas of the easel with the magic wand.

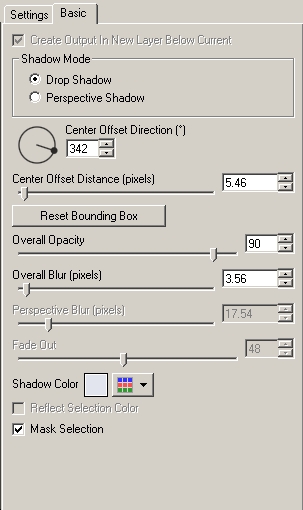
Now, copy the painting from step 27 and paste into your selection Effects, Plugins, Alien skin, Eye Candy 5 Impact, Perspective shadow, Basic, as follows, foreground color #e3e5ee
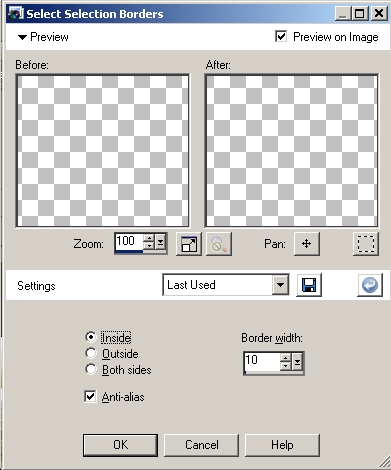
 Layers, New Raster layer Selections, Select all Selections, Modify, Contract, 50 pixels Selections, Invert and flood fill this selection with white Reduce in your layer palette the opacity to 35 percent Rename this layer to Border Layers, New raster layer Selections, Select all Selections, Modify, Select selection borders, Inside 10

and flood fill this border with white
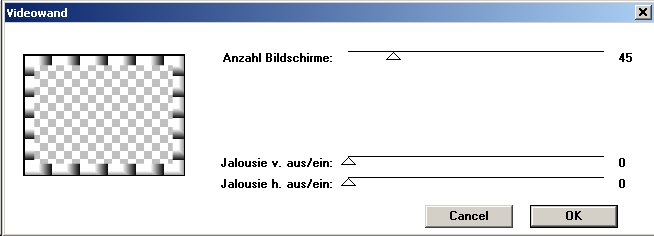
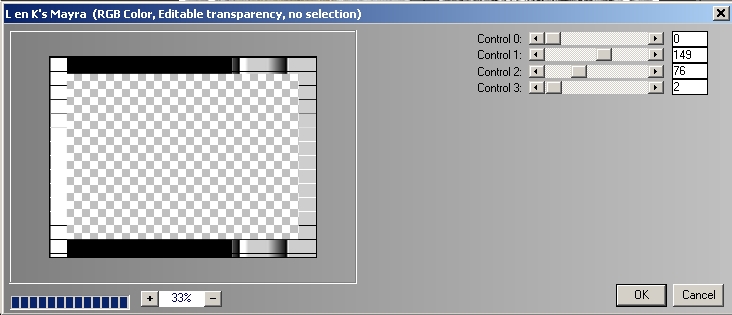
Selections, Select all Selections, Modify, Contract, 50 pixels Selections, Modify, Select selection borders, Inside 10 and flood fill with white Rename this layer to Border 2 Selections, Select none Select in your layer palette the layer with your easel Layers, Arrange, Bring to Top Open the tube paintersNV0904 Edit, Copy and paste as new layer Effects, Image effects, Offset, Horizontal -120, Vertical -120 Select in your layer palette the layer Border Effects, Plugins, Kiwi’s oelfilter, Videowand, as follows:
 Effects, Plugins, L en K Mayra, as follows:
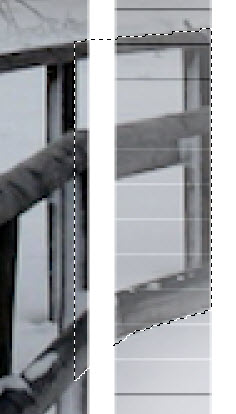
 Select in your layer palette the layer Border 2 Layers, Merge, Merge down Take the freehand selection and make a selection of the part of the bridge hidden by the frame

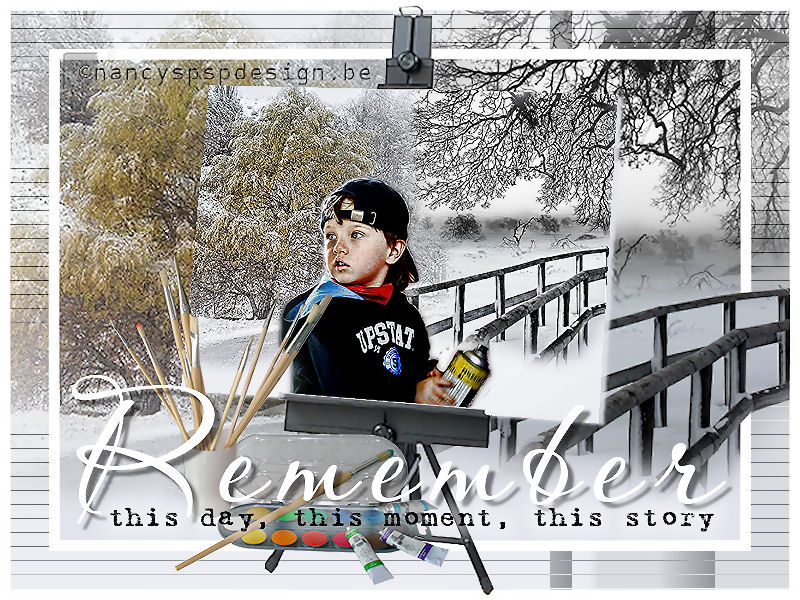
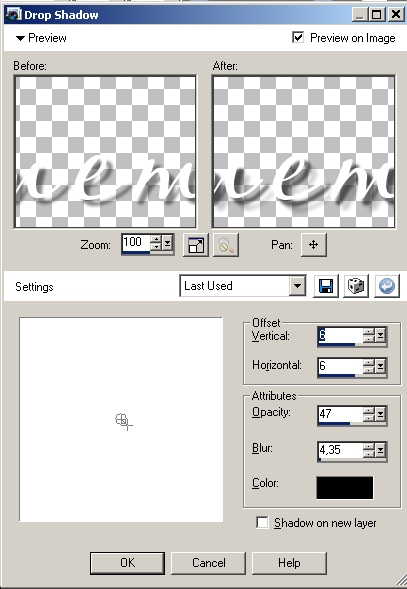
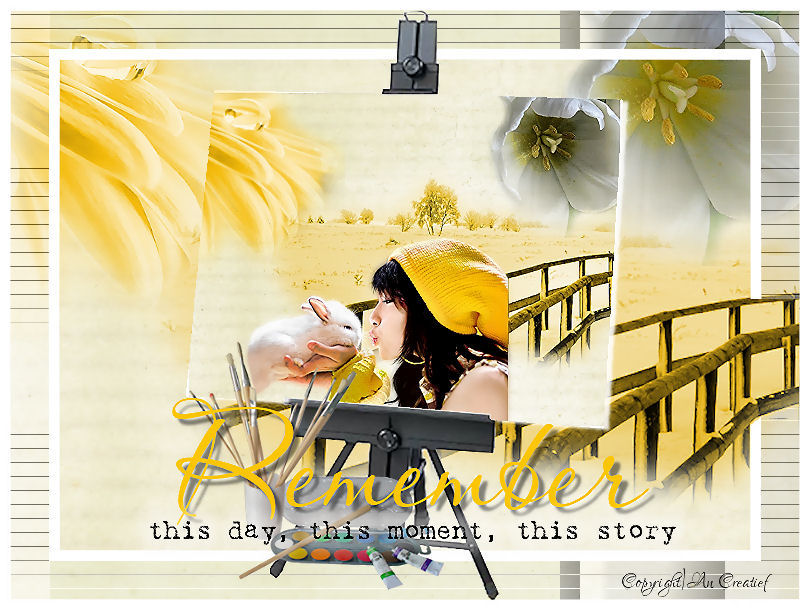
Note: Reduce the opacity of the border to make a better selection Hit delete Selections, Select none Select in your layer palette the top layer Layers, New raster layer Lock your foreground color Activate the text tool and choose the font Aquarelle, size 140 pixels Type your text (Remember) and put it as shown on example Layers, Convert to raster layer Effects, 3D-Effects, Drop shadow as follows
 Change the background color to black Activate the text tool again, choose the font Harting, size 26 pixels and type the second text -
Layers, Convert to raster layer
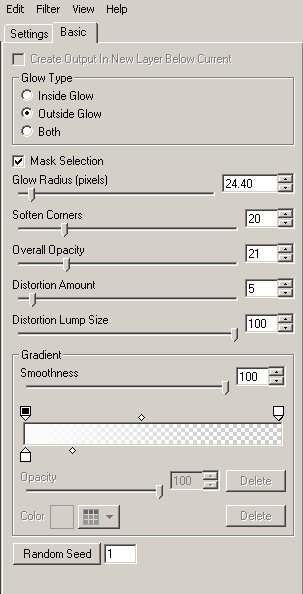
Effects, Plugins, Alien Skin, Impact, Gradient Glow, Basic as follows
 Layers, Merge, Merge all Don't forget to put your signature and save as jpg.
This is an extra
example made by An Creatief

Lesson A day to remember was written on April 16, 2009.
Back to Tag lessons
This site is © Copyright
Nancyspspdesign.be 2007-2008, All Rights Reserved |
